SK8Makers City Cruiser Teacher’s Kit
Product Description:
This kit will teach you the Roarockit method of laminating. The curriculum included guides you through teaching practice by pressing boards using the kit parts included, perfect for a 21st century classroom. Use one board to practice with, the other as a demo for your class or school board. Read about using this process as part of your credit-worthy education program, from STEM to construction technology, to physics of vacuum, to art & design, to general studies. STEM stands for Science, Technology, Engineering, and Mathematics.
The City Cruiser shares many of its dimensions with the standard street deck, which means you can outfit it with standard trucks and hardware available at any local skate shop. Upgrade to a set of bigger, bouncier longboard wheels and this highly maneuverable skate deck can roll over any sidewalk crack or bump without sending you flying through the air.
“The SK8Makers City Cruiser is a fun-to-ride skateboard designed for getting around town, especially for beginners who are just learning to ride a skateboard or old-timers like me who aren't in it for the tricks. For these reasons it's become the most popular board shape students produce in my DIY skateboard workshops.”
Matt Berger of SK8Makers is the author of "The Handmade Skateboard", a timeless guide to designing and building your own custom longboard, cruiser, or street skateboard from scratch. Through his book and workshops, Matt has inspired countless builders to make their own handmade boards. Since the first SK8Makers workshop in Los Angeles, CA in 2013, Matt has graduated hundreds of students with a diploma in the form of a custom skateboard.
Final size deck dimensions are approximately:
Length = 27”
Width = 8.5”
Wheelbase = 14.5”
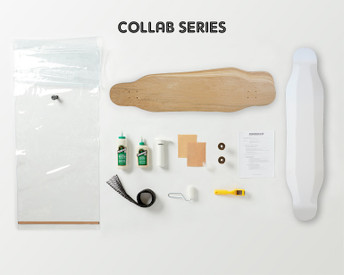
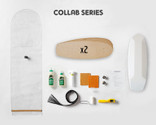
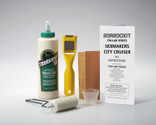
SK8Makers City Cruiser Teacher's Kit contains:
- 7-layers of Canadian maple veneer
- includes 2 face, 3 long grain core and 2 cross grain sheets
- 3-dimensionally shaped foam mold
- glue, roller and measuring cup
- edging tool and sandpaper
- Mini Curriculum and illustrated instructions
and a Thin Air Press Kit
- 14 x 47” heavy duty vinyl vacuum bag with one-way valve attached
- manual vacuum Super Pump
- breather netting
- extra sealing tape
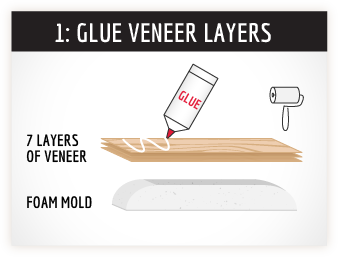
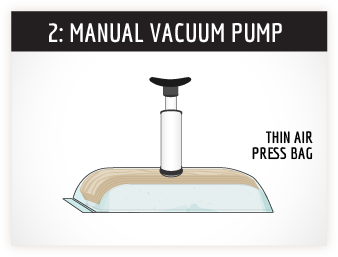
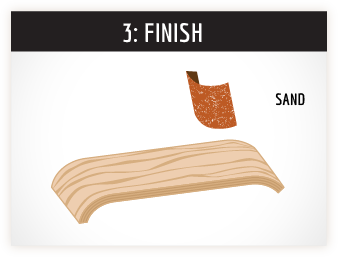
By following the printed instructions included in the kit box, you will be guided through the glue up, stacking on the mold, inserting and sealing into the TAP bag. Using the manual vacuum pump to evacuate the air, the Thin Air Press will press the veneers over the mold. The sanding process is described, as well as some graphics suggestions.
The foam mold, Thin Air Press Bag and pump, edging tool and breather netting are designed to be used for many, many builds.
Keep all your reusable kit parts in good working order by following the maintenance tips included with the kit.
Q: Is this kit reusable?
A: Yes. Every thing but the veneer and glue are reusable
Q: What if the TAP bag or valve leaks?
A: 99.9% of the time, the seal is not closed up properly. Dust and debris can prevent the top cap of the valve to seal, rinse cap with water. For more in-depth details, see the TAP kit FAQ’s page.
Q: My school has budget issues, how can we afford this?
A: Create an entrepreneurial environment. Building multiple boards can lead to creative ways of generating funds for a self-sustaining program. Hold an auction, find sponsors for boards, host an art show, all have been done with great success. See the Get Inspired area to see what other teachers are doing.
Q: What age is this recommended for?
A: We recommend no younger than 10 years old.
Q: How can I justify building boards in the classroom?
A: Teachers around the world have used this program as an incentive or for fun. They also use building skateboards as a focus to help students achieve their high-school credits: math and science, woodworking, environmental studies, art and design, business and entrepreneurship, teamwork, leadership, mentorship and outreach.
Q: Can I get more veneer, glue and other supplies?
A: For schools and groups, we have an online or downloadable order form where your school or institution can order bulk supplies by issuing us a signed Purchase Order.
Q: Will stuff last if I don’t use it right away?
A: Veneer will absorb and lose moisture, so keep it sealed in plastic (or the carton it arrived in) but away from any heat sources. Lay it flat to prevent warping. Prevent the glue from freezing.
Q: What do I do if the veneer breaks or splits?
A: Veneer is fragile until laminated, and it is common to split or snap (especially the cross grains). A stripe of glue and some masking tape to hold it until it dries will fix broken or split sheets. See video tutorial here.
Q: Can this kit be used to make a snowboard or wake skates?
A: The size of the bag determines how large a project you can fit into it. As the seams of the 14 x 47” TAP bag included here cannot be stretched open while pressing, you are limited to smaller projects. See our larger bag sizes for one that suits your project.
Q: Can the Thin Air Press make other things?
A: Yes! Furniture parts, marquetry projects, archery bows, sculptural pieces, really any bent or flat laminations work well in the Thin Air Press.
Q: What else do I need to complete this project?
A: A moisture protector is recommended (sponge on water-based outdoor clear coat) to seal all surfaces, especially your edges and before applying any graphics.
Included in the curriculum is a list of suggestions for setting up a classroom or other location with useful extras for teaching in a class environment.
Q: What if my school has a no-skateboarding policy?
A: The Roarockit Kits are all about building just the laminated wood part of a skateboard. As students build their very own board and can take enormous pride in creating custom graphics the boards very often are hung on a wall rather than being ridden right away. This provides the school the option to still enforce their policy, as the boards will not be actively used. Roarockit does not provide the wheels and trucks.
Q: Where do I get the wheels and trucks?
A: Roarockit supplies grip tape, but not hardware. We suggest involving your community by contacting a local skateboard shop (students are a great source for this information) and ask them to even come to speak to the class. Topics can be about safety, tuning, products and riding skills.
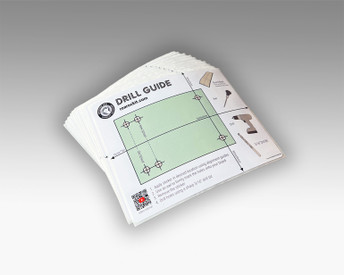
Use the guide holes on the bottom side to drill the truck holes through, using a 3/16” drill bit.
Always wear a helmet when riding!
 Loading... Please wait...

 USA
USA



 Calculated at checkout


